Korean convenience store self-checkout usually means scanning your own items, checking the on-screen basket and paying at the attached terminal. The important part is knowing which device reads a product barcode and which device takes your payment.
This guide follows the yellow emart24 self-checkout I photographed. The pictures show the start screen, scanner, a product being scanned, the card reader and a store payment notice. Other branches and convenience-store chains may use different machines, menus and access arrangements.
The short version: choose a language if available → start → scan every item → check quantities and discounts → select payment → wait for confirmation → take your card, purchases and receipt.
Before you start: self-checkout does not always mean an unstaffed store
A self-checkout can be available while employees are working, or during a store’s unstaffed hours. A machine inside the store also does not tell you how to unlock the entrance: read the door instructions separately if access is controlled.
emart24’s official self-checkout description says its machines support credit/debit cards and mobile payments rather than cash. It also explains that staffed and unstaffed operating hours vary by store. If you only have cash, check for a staffed till before scanning your shopping.
1. Find Language and Start on the screen
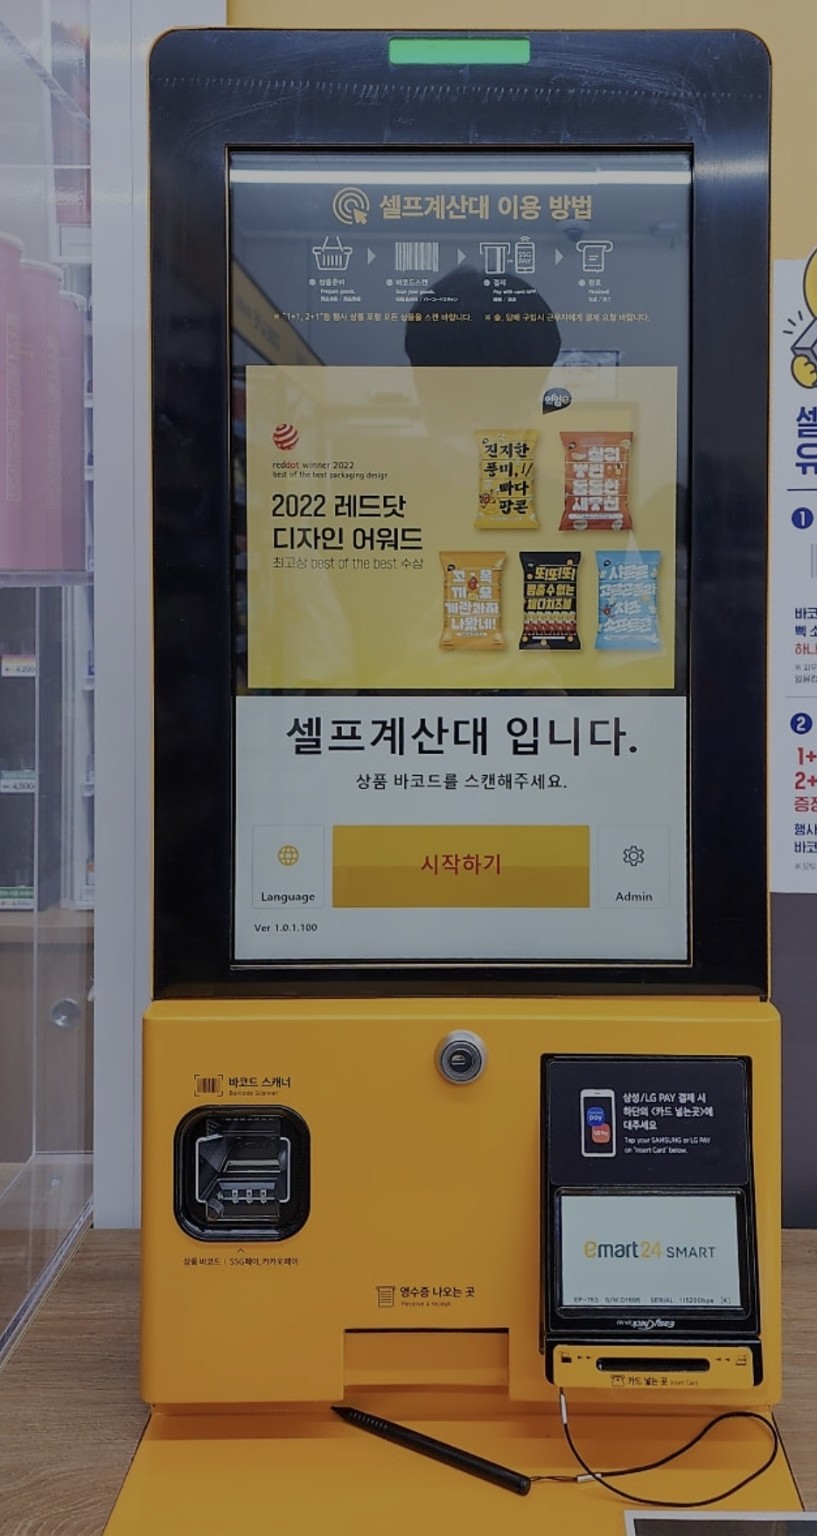
On the photographed start screen, Language appears at the lower left beside a globe icon. Tap it to see the options available on that machine. The large yellow 시작하기 button means Start.
The screen also says 셀프계산대 입니다 (“This is a self-checkout”) and asks you to scan a product barcode. Start from the machine’s opening screen and follow its prompts; do not assume every model needs exactly the same first tap.
The small Admin gear is for store management. It is not a checkout or language button.
2. Use the barcode scanner, not the payment reader
The scanner in my photographs is the square window below the screen on the left. Its label reads 바코드 스캐너, with Barcode Scanner printed underneath. The card reader is a separate device on the right.
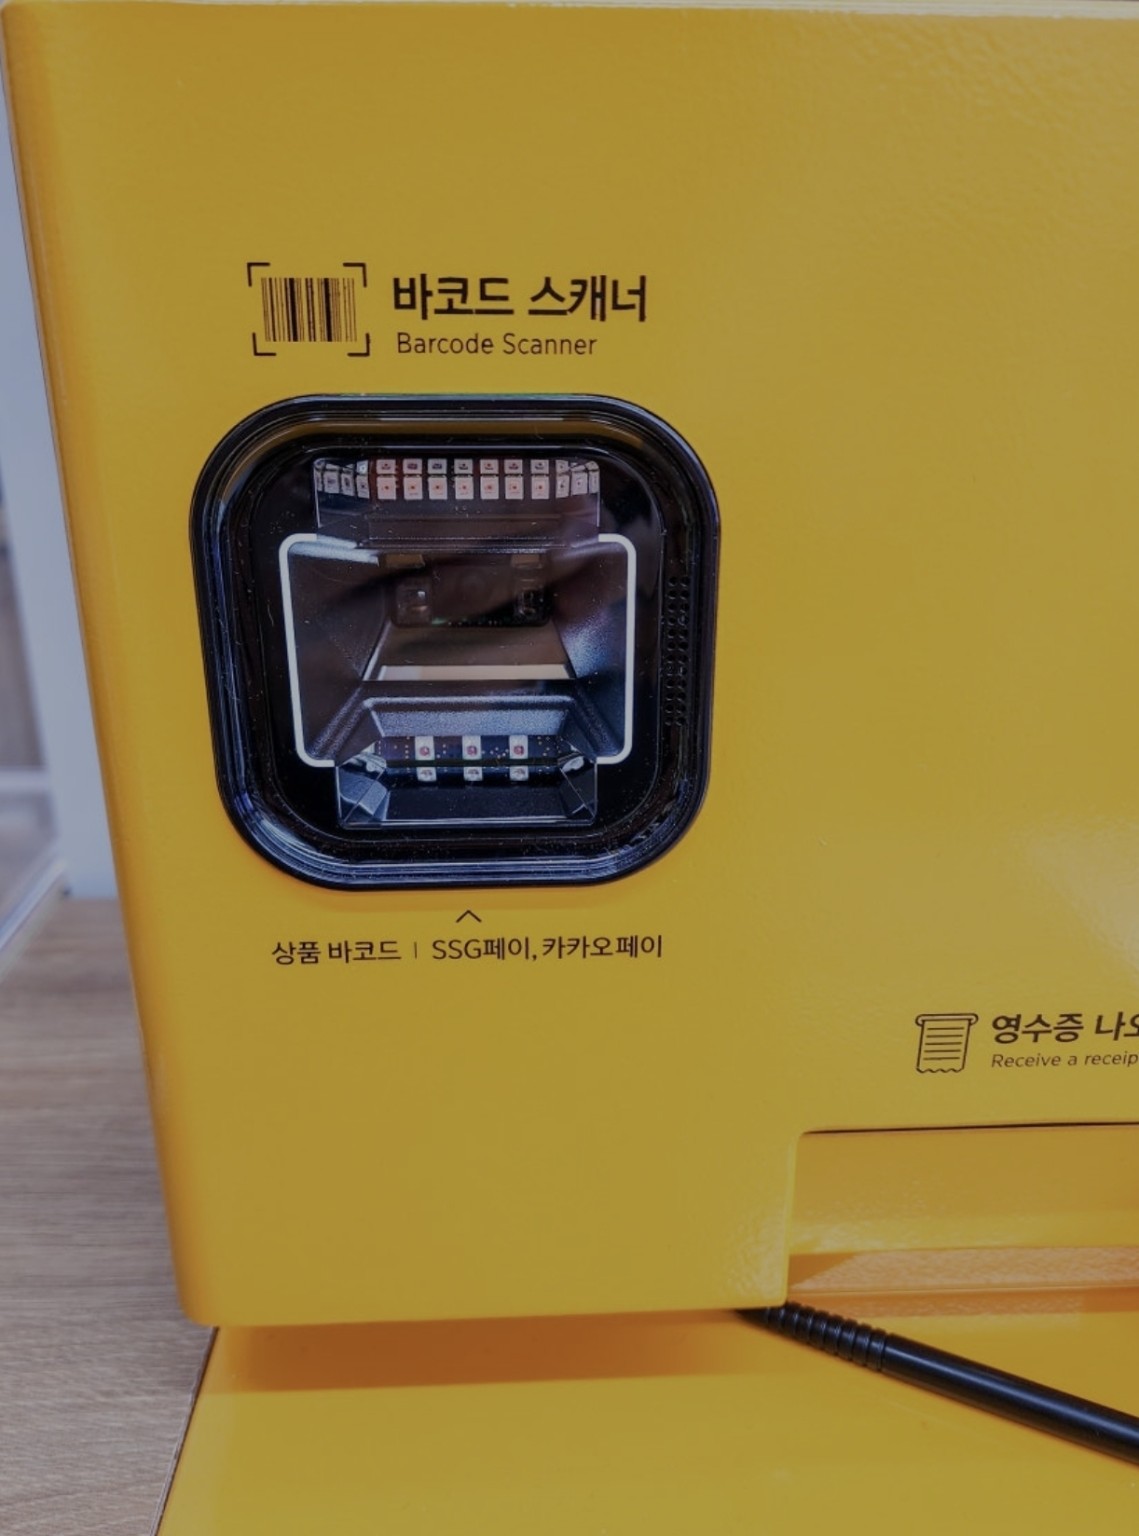
Find the retail barcode printed on the item’s packaging and turn it towards the scanner window. A marketing QR code or a date printed on the package is not the same as the product barcode.
Hold the item steadily, then check that its name and quantity appear on the screen. Use the displayed basket as your confirmation rather than relying only on a sound. If it does not register, rotate the package or gently flatten a folded barcode and try again.
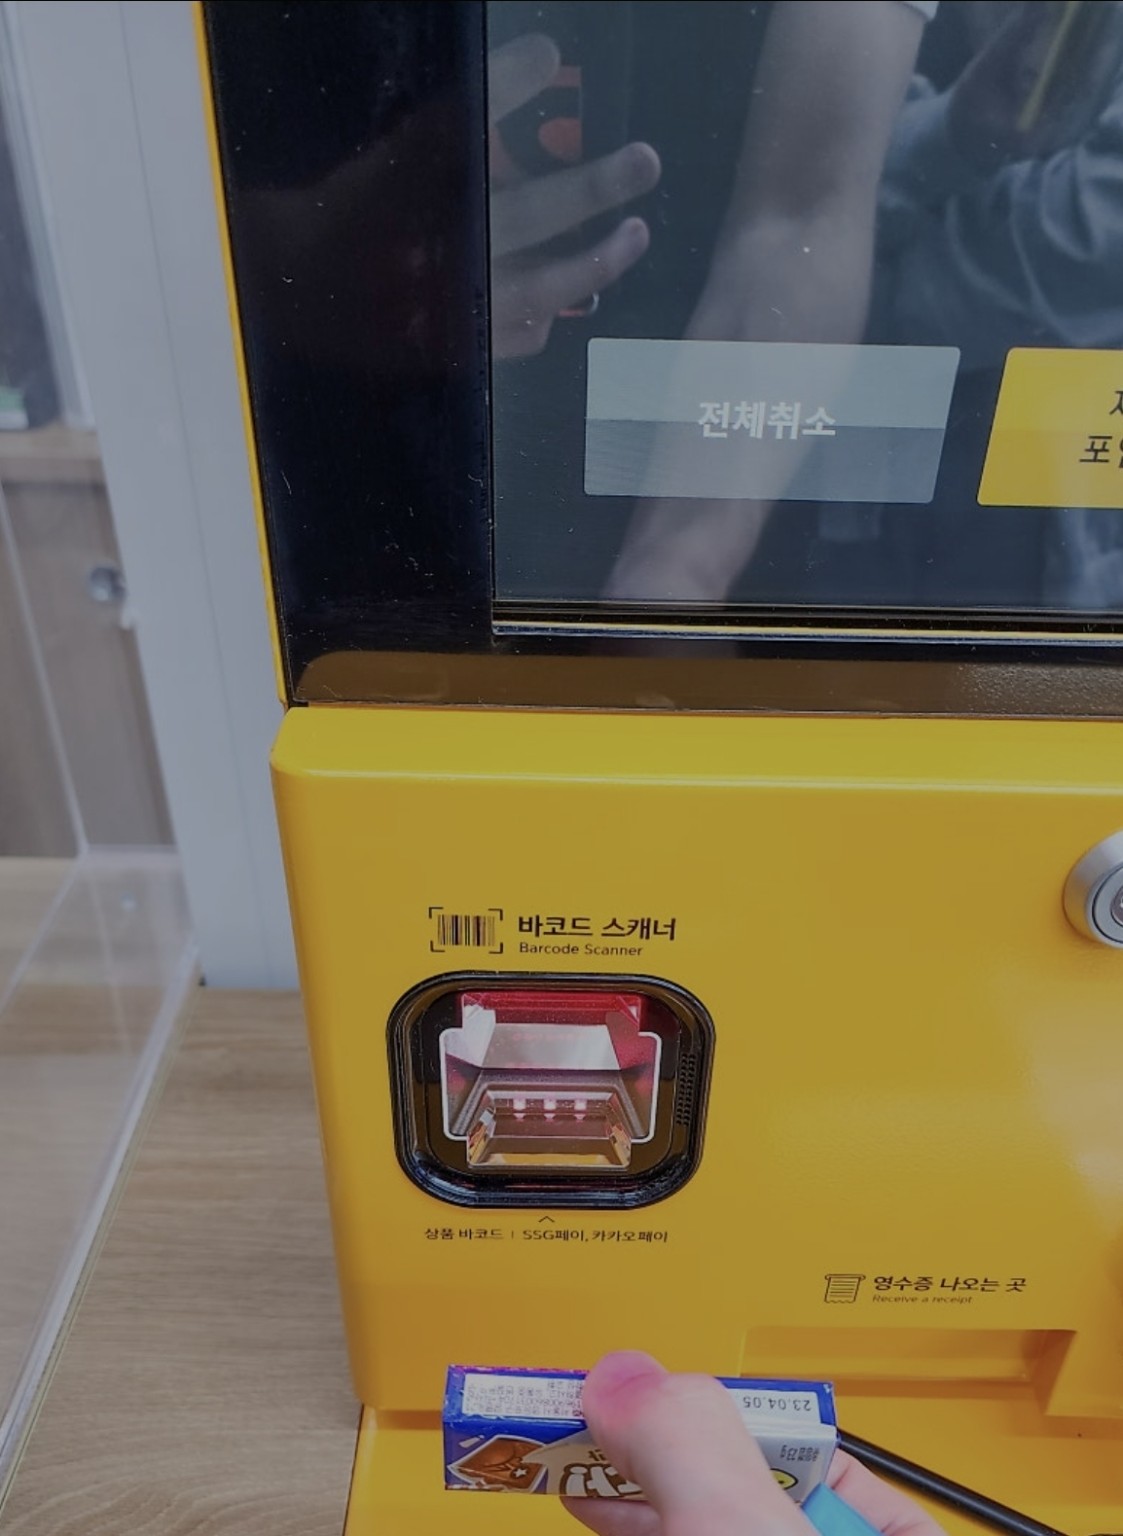
A useful routine is to keep unscanned items on one side and scanned items on the other. If you have several identical products, register the quantity using the machine’s instructions and compare it with the number you are taking.
3. Check the basket, promotions and any bag charge
Before paying, compare the screen with your shopping: the product names, quantities and total should make sense. If an item appears twice by mistake, use an available item-removal control or ask for help. Avoid continuing with an incorrect total just to finish quickly.
For 1+1 or 2+1 offers, check which products and combinations qualify, register all the items you are taking and confirm the promotion in the basket. Do not leave an extra item unregistered because a shelf label calls it free. If the offer is not reflected, resolve it before paying.
If the screen offers a shopping bag, choose whether you need one and check any added charge. Membership, coupons and point-redemption prompts are separate from the payment itself; follow the available skip option if you do not use the service.
One photographed screen shows 전체취소, meaning Cancel all. In a checkout basket, this is a control for abandoning the current selection. It is not proof that a payment which already went through has been refunded.
4. Pay at the card reader and wait for completion
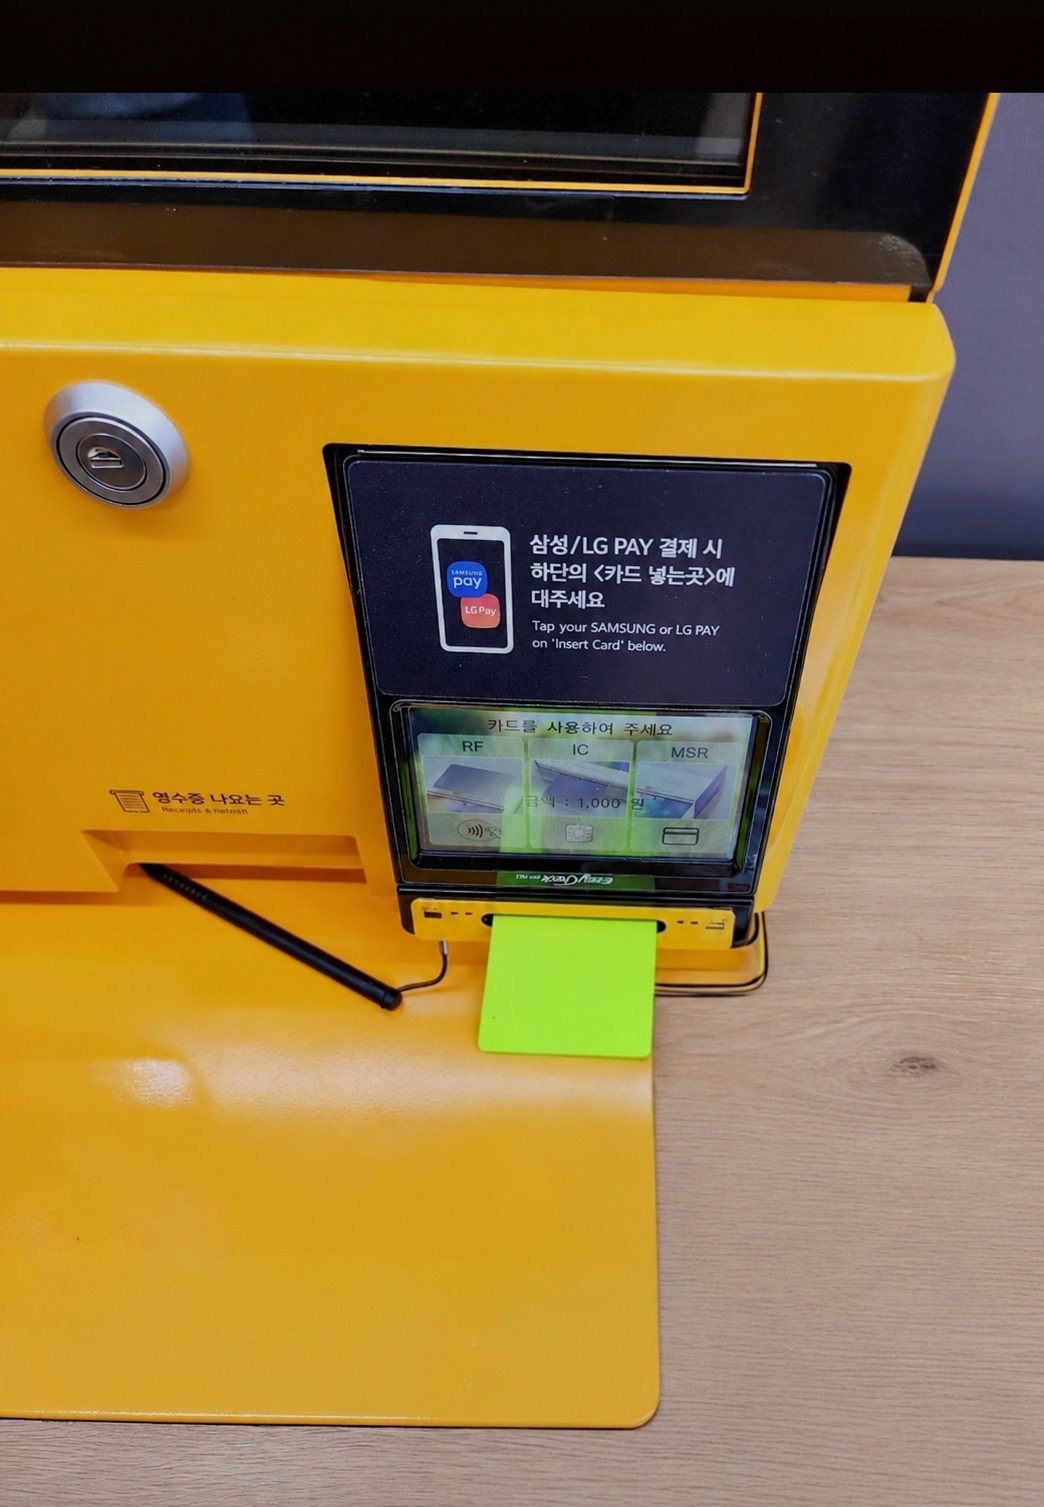
After reviewing the total, select the payment method offered by the screen. For a chip card, use the slot indicated by the reader and follow the terminal’s prompts about when to remove it. Do not insert the card into the receipt opening.
For mobile payment, distinguish a barcode-based wallet from a contactless phone payment. A supported wallet barcode may be presented to a scanner after selecting the appropriate option; contactless payment uses the reader position indicated by the terminal. Follow the current device instructions rather than presenting every phone to the product scanner.
A payment logo alone does not confirm that your particular foreign-issued card, phone, wallet or registered card is supported. If payment fails, check the message and ask for help or try another accepted method. If a charge notification arrives but checkout does not show success, ask the store to check the transaction before repeating payment.
For the differences between phone services, see our Apple Pay and Samsung Pay guide for Korea. Do not assume that instructions on this photographed machine apply to every phone or branch.
Read the store payment notice carefully
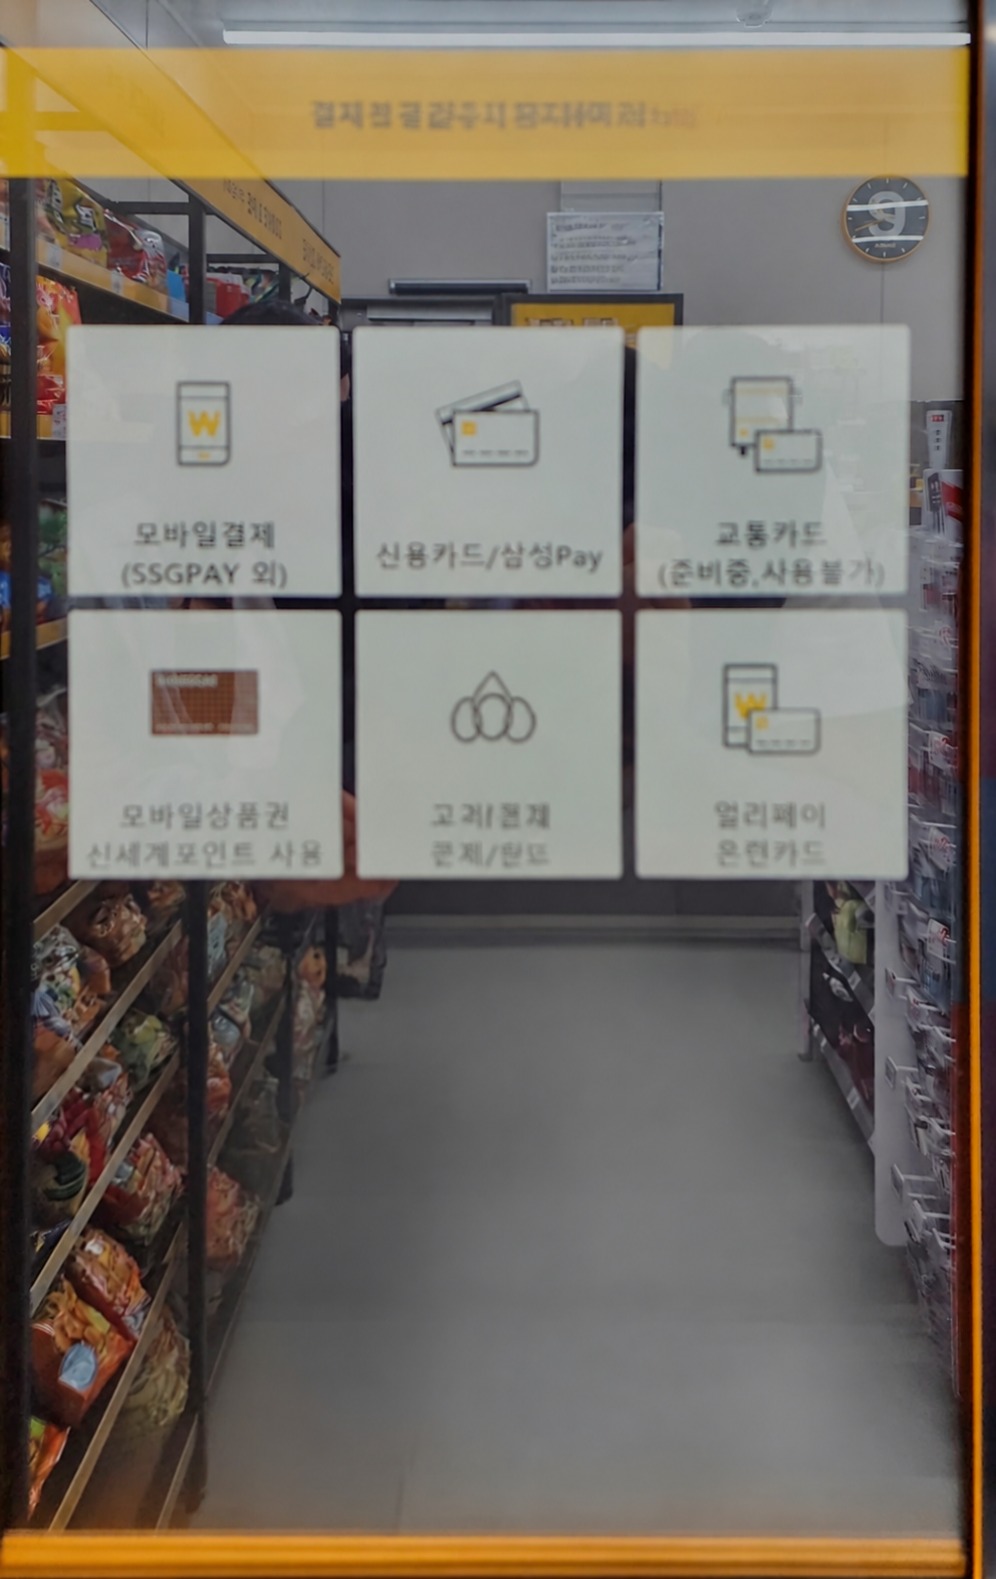
The photographed notice lists card and mobile-payment categories, but the transportation-card box specifically says 준비중, 사용불가: “in preparation; not available.” This is why seeing a transportation-card icon is not enough to assume you can use it.
Treat this image as a record of that store’s notice when photographed. It does not establish today’s payment support at another branch. For emart24’s own app-payment registration and conditions, use its current official payment guide; an app service and a physical-card transaction are different options.
5. Confirm success, then take your card and receipt
Wait for the screen or terminal to confirm completion. Then check that you have your card, every purchased item, and a receipt if requested. A bag of scanned goods is not by itself evidence that payment finished.
Look for 영수증 (“receipt”). On this terminal, the paper outlet is labelled 영수증 나오는 곳 and sits beside the reader/scanner area. Keep the receipt if you may need to check a price or discuss a problem with the store.
When you need help or a refund
For an unrecognised barcode, an incorrect basket or a payment error, use staff assistance or the contact instructions displayed in the store. If no one is present, do not guess that a frozen screen means the items are paid for.
For a completed purchase, emart24’s official FAQ on unstaffed-store refunds directs customers to return during staffed hours with the payment card, receipt and goods. Eligibility depends on the product and its condition; refrigerated or frozen products may be excluded. A basket’s Cancel all button is not a substitute for that refund process.
If a product or service requires age verification or staff handling, follow the store’s instructions. Do not assume a normal product scan can replace any required check.
Useful Korean to show a staff member
- 셀프계산대 사용을 도와주세요.
Please help me use the self-checkout. - 바코드가 안 읽혀요.
The barcode will not scan. - 같은 상품이 두 번 찍혔어요.
The same item was scanned twice. - 결제가 완료됐는지 확인해 주세요.
Please check whether payment was completed. - 이 카드로 결제할 수 있나요?
Can I pay with this card? - 영수증 주세요.
A receipt, please.
Once the scanner and reader are familiar, the process is much easier to follow. Take a moment to check the basket before paying and the completion message before leaving. For food choices, heating instructions and eating-area etiquette, continue with our Korean convenience-store guide.
Photos: ferry. This guide describes the photographed emart24 machine; exact screens and supported services vary by store and machine. Official self-checkout and refund information checked October 28, 2026.